Showing posts with label tomato. Show all posts

Friday, 29 November 2013

Easy Peasy Tortilla and Hummous Pizza


I love homemade pizza. Or rather, I love the idea of homemade pizza. But over the years, although I have had some success stories, I feel that I have spent too many pizza-making evening toiling away over a dough that ends up a bit too sticky or just not quite delicious enough, and subsequently the yummy toppings were always just slightly let down by the base. And not only did store-bought bases feel like cheating, they were also bland. So imagine my delight when I stumbled upon Dreena's homemade pizza, which uses a tortilla wrap for the base - ideal! A little bit creative (store-bought tortillas don't feel so much like cheating!), nice and simple, and best of all, TASTY! This is the homemade pizza I have been waiting for.

And so I decided to share my take on this fun Friday treat with you. As Dreena's original recipe is in fact vegan, you could certainly leave out the cheese to make this vegan-friendly - but I love cheese, so had to include it! I didn't half my cherry tomatoes, but that led to some less-than-fun explosions of burning hot tomato juice when I was eating, so I have suggested halving them in my method below. You can adapt this recipe to include any other toppings you choose - perhaps red onion, olives, or sweetcorn would also be nice. Mix it up a little and try your own toppings! Because that's the beauty of homemade pizza - it can be made exactly how you like it. What are your winning combinations for pizza toppings?

Tortilla and Hummous Pizza

Ingredients:

2 tortilla wraps
1 red pepper, sliced
approx. 5 small mushrooms, sliced
approx. 5 cherry tomatoes, halved
4 tbsps hummous
a little Cheddar cheese, grated

Method:

Pre-heat the oven to 200ºC. Put the chopped pepper, mushrooms and tomatoes in a roasting tin and roast in the oven for 15 minutes. On a separate oven tray, place the tortillas, and bake for 5-10 minutes (checking frequently to ensure they do not burn!). Remove the tortillas from the oven and leave to cool while the vegetables continue to roast. When the vegetables are done, remove from the oven. Spread the hummous over the tortillas (putting only a thin layer in the middle, to ensure it does not get soggy, and more towards the outside). Spread the vegetables evenly over the hummous, and finally, sprinkle with the grated cheese. Pop the pizzas in the oven for 5-10 minutes, until the cheese has melted and the hummous has 'cooked in' to the base a little.

Monday, 4 November 2013

Lentil 'Meatballs' and Tomato Sauce


I love taking inspiration from other food blogs - in terms of both style and content. I have already mentioned one of my favourite blogs, The Stone Soup on here - not only is Jules very knowledgeable about her subject, but she has a great style that I love reading. Plus all of her recipes come with tweaks, so even when she blogs about a meat or fish-based dish, she gives pointers on how to make it vegetarian or vegan. Her recipes are also nice and simple, which is always a plus! But another thing I love about her blog is how interactive it is - lots of readers always comment on her recipes, and - perhaps following her lead - are always keen to share how they have tweaked the recipe to suit their own needs or tastes. The end result is an amazing melting pot of culinary ideas based around a common dish, which I find so inspirational.


Last night's dinner was an amalgamation of one of Jules's recipes and one of Heidi Swanson's. Jules had blogged about lentil balls as an alternative to meatballs, and one of the commenters mentioned that they had made Heidi's Five-Minute Tomato Sauce to accompany the lentil balls. The sauce sounded so amazing that I just had to try both it and the lentil balls (that I keep accidentally referring to as meatballs....slips off the tongue more easily, doesn't it?!) and I was really impressed with both and just had to share this recipe with you. (David really enjoyed it too, so it has also passed the 'meat-eater test'.)

Lentil 'Meatballs' and Tomato Sauce

(Serves 2)

Ingredients:

115g dried brown lentils
500ml vegetable stock
3 tbsps olive oil (plus more for drizzling)
1 1/2 teaspoons crushed red pepper flakes
1/2 tsp salt
3 cloves garlic, crushed
1 tin chopped tomatoes
1 tsp lemon juice
75g ground almonds
1 medium egg
150g dried spaghetti

Method:

Pre-heat the oven to 200ºC Put the lentils in a medium pan and pour over the stock. Bring to the boil, then reduce to a simmer and cook for approximately 20 minutes or until lentils are soft. Meanwhile, prepare the tomato sauce. Put the olive oil, red pepper flakes, salt and garlic in a pan and gently heat until the aromas are released - don't let the garlic brown. At this point, add the tomatoes, and bring to a gentle simmer. Crush any larger pieces of tomato between the side of the pan and the stirring spoon. Take off the heat and add the lemon juice. Pour the sauce into an oven-proof bowl and set to one side. Once your lentils have finished cooking, drain them, put them in a bowl and rougroughly mash them. Add the ground almonds and the egg, and mix well. Once everything is well combined, use a soup spoon to help form the lentil mixture into medium-sized balls, and place the balls into the tomato sauce. Drizzle with a glug of olive oil. Bake the whole thing in the oven for 20 minutes. After 10 minutes, put the spaghetti into a large pan of boiling water and cook until tender (about 10 minutes). Serve the lentil balls and tomato sauce on top of the spaghetti for a tasty, filling dinner.

To serve, Jules suggests sprinkling with parmesan, which I forgot to do, but that would definitely be really tasty!


Monday, 28 October 2013

Cheese and Tomato Rice


I have the day off work today, which is nice - a whole day to myself with no plans. Except waiting in all day for a parcel to be delivered, so I am house-bound. Still, the weather is pretty horrible just now, so I am not too upset that I can't go out. Instead, I am taking advantage of all of this free time, and as well as catching up on the book I'm reading, I decided this morning to give my blog a little spring (or autumn) clean: I have added a new page, basically a contents page, listing all of the recipes I have blogged about, categorised by meal/type. This should make it easier for you, my readers, to find the recipe you're looking for, and also easier for me to keep track of what I have and haven't blogged about, and what might be missing. Hopefully you will find this page helpful - it can be found here.

I also thought today would be a good day to tell you all about one of my favourite autumn/winter dishes - it's filling, it's tasty, and it can easily be adapted to suit the vegetables you have to hand that day. The recipe is Cheese and Tomato Rice, and is based on the Cheddar and Tomato Rice recipe I found in the BBC Good Food 101 Veggie Dishes cookbook. It is not one of my quickest recipes, as it has to go in the oven for half an hour after you have cooked it on the hob - but during that half hour, I like (ok, maybe 'like' is taking it a bit too far) to wash the dishes, so that after dinner there's not too much to clean up. It's also good reheated - I usually just keep it in the oven dish that I bake it in, and then pop the whole thing back in the oven for half an hour (including the time it takes the oven to pre-heat) - this seems to heat it through nicely.

Cheese and Tomato Rice (serves 4)

Ingredients:

3 tbsp olive oil
1 onion, thinly sliced
1 red pepper, de-seeded and sliced
250g mushrooms
1 garlic clove, crushed
1 tin chopped tomatoes
1 litre vegetable stock
300g long-grain rice
salt and pepper, to taste
150g frozen peas
100g cheddar, grated

Method:

Heat the oil over a medium heat in a large pan. Add the onions, red pepper and mushrooms, and fry until completely softened. Add the garlic and cook for one more minute. At this point, turn on your oven to pre-heat it to 180ºC (160ºC fan-assisted). Add the tomatoes, stock and rice, and season. Bring to the boil, stirring gently, then reduce to a simmer, still stirring. Add the frozen peas. Continue to simmer for about 5 minutes, stirring frequently, until almost all the liquid has been absorbed. Transfer the mixture to a casserole dish and scatter over the grated cheese. Put in the oven and bake for approximately 30 minutes. This is delicious served with a side salad, but I find it filling enough on its own too.


The great thing about this recipe is that you can easily add any vegetable you prefer - asparagus, sweetcorn or broad beans would all be nice, I think. Let me know if you customise this recipe to your own needs/tastes, I'd love to know how it turns out!

Sunday, 25 August 2013

Sunday Pasta Salad

I woke up today with the sudden desire to make a nice pasta salad - preferably in bulk so I could take it into work for lunch a few days this week. The only problem being that Sunday is our usual food shopping day, so the cupboards are usually pretty bare until we can be bothered to head to the shops. I thought I'd see what I had kicking about in the kitchen anyway, and was pleasantly surprised! So, taking my inspiration from this Jamie Oliver recipe, I decided to put my ingredients together and see if I could create a delicious pasta salad. I was really happy with the result, so thought I would share it with you. I am also getting better at thinking like a blogger, as I managed to take photos not only of the finished product, nor of the finished product and method, but actually of the raw ingredients, the method AND the finished product. Impressive or what? Yes, I thought so too.

This pasta salad is great as it feels so fresh (thanks in part, I think, to using rice vinegar - a tip from Jules at The Stone Soup [another great blog I recommend], who wrote an interesting post on different types of vinegar). Before reading that post, I just blindly followed what the recipe said in terms of what type of vinegar to use - too scared to try a substitution for fear it might ruin the dish. But as usual, Jules gives an honest, no-nonsense introduction to this subject that helped me (and will help you) to be more creative in my use of different vinegars. (Jules's guidance reassures me that never again will I spend an hour and a half traipsing around what feels like every food shop in the west end of Glasgow searching for the cider vinegar that a particular recipe calls for. Not that I have ever done such a thing, of course....!)

It's also not too oily (I use much less oil than Jamie suggests....but then again, I do find that he has a bit of an obsession with the good ol' olive oil, and it's usually safe to use about half of what he suggests). I used artichokes on a whim as I had them in the fridge, but as they were stored in a jar of oil, I drained them on kitchen roll before adding them to the salad. Again, this helps to keep the whole thing nice and light and summery (perhaps the lovely weather today was what inspired me to try this out, come to think of it).

So without further ado, I give you my pasta salad.

Ingredients:
150g tricolore fusilli
300g cherry tomatoes
1/4 cucumber
a good handful of stoned black olives
a good handful of artichoke pieces
2 cloves garlic
1 tbsp fresh chives
a handful of fresh basil
5 tsp olive oil
2 tsp rice vinegar
salt and pepper, to taste


Method:

Bring a pan of water to the boil, add the pasta and garlic cloves (unpeeled). Whilst the pasta is cooking, chop the cucumber, tomatoes, artichokes and olives. I like to chop them all pretty small, as you can see from the picture below, but you can make them as chunky as you like, if you prefer a bit more bite to your salad. Also, finely chop your herbs.


Once the pasta has cooked, drain it and remove the garlic cloves. Put the pasta in a serving bowl. (I like to pat it dry with a bit of kitchen roll, too, to avoid the salad being too watery, and also because it helps the dressing to 'cling' better to the pasta.) Squeeze the garlic out of its skin and mash them up. If you have a mortar and pestle, now is the time to use them, but if, like me, you don't, a small bowl or ramekin and teaspoon/fork works just fine. Add the oil and vinegar, then salt and pepper, and mix well. Mix the dressing into the salad and you're ready to serve it up!

I also, feeling experimental, tried some of the salad with a little mayonnaise mixed in, and it was really good too. If you want a slightly richer tasting salad, I'd recommend the mayo route. Otherwise, just the oil and vinegar dressing is really all you need - completely delicious!


I should point out that the above quantities make enough for two portions (if you're eating it as a light lunch), so if you're wanting to make enough for a few days or a few people, I'd suggest doubling the above. (The only reason I made so little was due to the whole 'cupboards being bare' situation I mentioned earlier!)

Let me know what you think if you make this!

Thursday, 22 August 2013

More Ottolenghi - Marinated Buffalo Mozzarella and Tomato

Yesterday I wrote a bit about how fussy Yotam Ottolenghi can seem when writing about his recipes in his book, Plenty. So fussy that it would almost put me off trying some of his recipes, actually. But I decided to give myself a challenge and see if I could do his Marinated Buffalo Mozzarella and Tomato any justice using bog-standard, supermarket-bought ingredients. After all, I figure that this is what most people will end up using. I actually went one step further and bought the cheapest mozzarella I could find, just to be bad! (Um, ok, and to save money...) So I tried this recipe using Tesco Everyday Value mozzarella and Tesco 'juicy cherry tomatoes' (that's what the box said they were!). All other ingredients were for the marinade, and I had all of these on hand, with two exceptions. I had no lemon to get lemon zest, so instead I opted for a splash of lemon juice from a bottle (shock! Horror!), and I didn't have any fresh oregano, so I used dried instead (remember to always reduce the quantity if you're using dried herbs as an alternative to fresh, as the flavours are intensified).

Now, I have to give top marks to Mr Ottolenghi on the simplicity of this recipe. It really is extremely easy to prepare and takes hardly any time (if you don't count the 15-30 minutes' time that the mozzarella is to sit in the marinade - which I don't). I'll give you a quick run-down of how I made this, so you can get an idea of just how easy-peasy it really is.

My makeshift mortar and pestle!
The first step is to dry-fry 1/2 a teaspoon of fennel seeds until they pop - at this point, transfer to a mortar and pestle and crush the seeds. I don't have a mortar and pestle (hint hint, if anyone wants to buy me a present!), so I just crushed the seeds with a teaspoon in a ramekin (but any small bowl could be used), and this worked very well. Tip into a small bowl (if you have crushed the seeds in a bowl rather than a mortar and pestle, then obviously just keep them in that bowl, and congratulate yourself on saving on a bit of washing up) and add the following ingredients: grated zest of one lemon (or a splash of lemon juice), 15 finely chopped basil leaves, 2 teaspoons of chopped oregano (or 1 teaspoon of dried), 2 teaspoons of extra virgin olive oil, 2 teaspoons of rapeseed oil, 1 garlic clove (crushed), 1/2 a teaspoon of sea salt, and black pepper. This is your marinade.

The marinade
Ottolenghi suggests ripping the mozzarella (250g) into chunks and then smearing these with your marinade. But to me, it makes a lot more sense to just add the mozzarella chunks straight into the bowl and mix it up a bit to ensure all the mozzarella is covered by the marinade. That way, no marinade is wasted and also it's a less messy process. Win-win!

You then let the mozzarella sit in the marinade for 15 to 30 minutes, then chop your tomatoes into wedges and serve together with the mozzarella. The recipe suggests drizzling with extra olive oil, but I didn't do this, partly because I was so excited to try out the salad that I forgot (oops) and partly because I don't really feel it needs any extra oil.

Mozzarella in the marinade
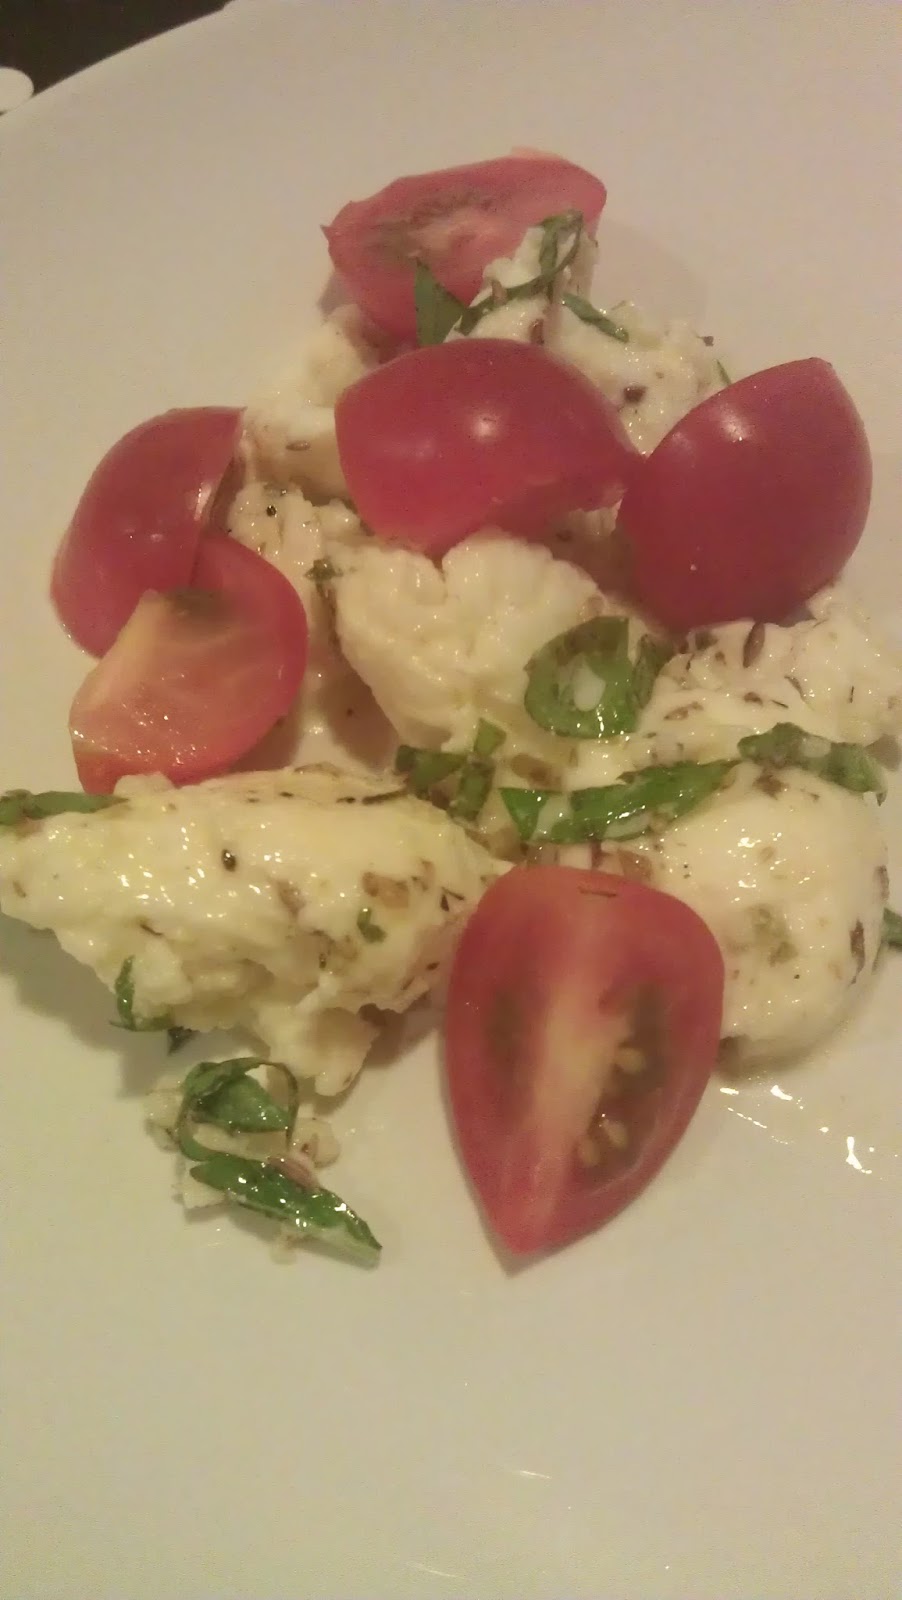
So what was the verdict? I really enjoyed this. I had originally intended to taste some tonight so I could blog about it and take the rest into work for my lunch tomorrow, but it was so good that I gobbled it all up!  (I hasten to add at this point that I had only made a half portion, so although I am greedy, I'm not as greedy as it may have just sounded.) The fennel really shines through and gives the dish an unusual taste, and it looks beautiful, with all the ripped up basil (and I'm sure if you had fresh oregano it would only look even better).

The finished product - delicious!
But what about the 'poor' quality of my ingredients, I hear you cry! Well, I have to say, that with the mozzarella the star of this dish, I might buy slightly better quality cheese next time. But it would all depend on the occasion. If it were just to be a lunchbox filler, I'm quite happy with the cheap mozzarella - it tasted nice enough to me. But if I were serving it to guests, I'd probably prefer to know I was serving slightly higher quality fare. And the tomatoes? Actually, I really enjoyed my straight-from-the-fridge tomatoes in this salad! Yes, I'm sure it would be absolutely delicious with a lovingly homegrown fruit instead, but honestly, I wouldn't waste any time or money searching for the perfect tomato for this recipe. Go with a type of tomato that you enjoy, and you'll be fine. I am not a huge fan of regular-sized tomatoes, so tend to substitute the sweeter cherry tomatoes in a lot of dishes that call for ordinary tomatoes. So doing the same here worked just fine.

Marinated mozzarella and tomato 
I am hoping that perhaps I can get some tomatoes growing in my wee patch of garden next year, so perhaps at that point I will try this recipe with home-grown tomatoes instead and see what I think, but I can't imagine it making that much of a difference. What do you think? How important is the quality of ingredients to you? And does anyone grow tomatoes (or anything else that could grow well in a pot in the harsh Scottish climate) that could give me some tips? (I'm not the most green-fingered, but I am enthusiastic and hope I will learn quickly!)