Sunday, 6 October 2013

Morning Glory: breakfasts that inspire

It's the most important meal of the day - or so we are always told. Yet I hear so many people saying they never or rarely eat breakfast ("Ugh, how can you eat first thing in the morning?"). I don't know whether it's possible to train your body to feel repulsed by the idea of food first thing, but it does seem to me that it's a strange thing to feel repulsed by - when did these feelings of disgust at the thought of breakfast start - didn't the parents of these people feed them breakfast all through their childhood? So presumably they used to eat breakfast on a regular basis. Surely this revulsion is a learned reaction to the first meal of the day?

I have always had to eat as soon as I wake up - at least if I'm going out to work/university/school - basically, if I want my body and brain to function! So I just can't understand why anyone would feel they couldn't eat at this time. For me, it's the opposite: never do I feel more in need of fuel for my body than first thing in the morning. But I have to say, I am not a cereal girl. Perhaps the people who say they can't stand the idea of food first thing actually mean they can't stand the thought of typical breakfast food first thing. Well, I can understand that a bit better.

I need food that I love the taste of, that is quick to prepare (as well as loving food, I really love my sleep!!), and will also keep me going for longer than a slice of toast or cup of black coffee. (In fairness, not being a coffee drinker, I have no idea how long a cup would keep me going for....but I'm pretty sure my belly would be rumbling fairly quickly after the last sip.) So I thought I'd share a couple of my favourite breakfasts with you - and I would love to hear any ideas you have for perfect breakfasts. These are not necessarily all healthy breakfasts, but I'm sure they are all healthier than not having breakfast and subsequently snacking on crisps and chocolate throughout the morning at work.

Eggs and Toast

With so many different ways to cook the eggs, this is one you can easily keep feeling fresh and interesting (I can get bored of eating the same breakfast every single day). For a trip down memory lane to childhood breakfasts, nothing can be as comforting as a soft-boiled egg and 'soldiers' made of toast. Delicious, nutritious, pretty filling, and a comfort food - how many different boxes do you want your breakfast to tick?! For tips on boiling your eggs, check out this previous, egg-focussed post.

Alternatively, I love to scramble a couple of eggs (somehow, one never seems enough) - keeping the heat medium-high, so that the eggs don't go rubbery, and adding a little butter at the end. Take the pan off the heat just before you think the eggs are cooked through, as they will continue to cook a little after you have taken the pan off the heat. Sometimes, inspired by the German Bauernfrühstück (literally: farmers' breakfast), I fry up some chopped vegetables (mushrooms, peppers, tomatoes....or anything else you fancy really) and then add the eggs to scramble it all together. That makes a proper meal of it! 

My most-recent addition to the egg-repertoire is poached egg. This one is a little trickier to pull off, but I have finally perfected my method, and will share it with you here. 

First, bring a small pan of water to a gentle simmer. Add a little vinegar (any type can be used, so I usually just use the cheapest I can find in the supermarket). The vinegar will help the egg stay together during the poaching, but we don't really want to taste it, so I just use my best judgement as to how much to add. I'd maybe say 2 to 3 teaspoons. Bring the pan back to a gentle simmer. Crack an egg into a cup, being careful to keep the yolk intact. Now, using a slotted spoon, gently stir the water round and round, to create a whirlpool effect. Carefully drop your egg into the middle of the whirlpool and set your timer for 2-and-a-half minutes. (This is also a good time to put your bread in the toaster.) When the timer goes, take the egg out of the pan using the slotted spoon, and drain on kitchen paper. Butter your toast and serve the egg on top. The perfect poached egg should have a runny yolk and completely set white. I like to chop some chives and sprinkle them on top, sometimes.

Don't worry if you don't manage first time. Try experimenting with the heat of the water, amount of vinegar, or the timing. For some reason, 3 minutes used to work well for me, but now 2 and a half seem to do it. Instead of toast, why not serve this on an English muffin to really add a touch of luxury to your breakfast? 


Porridge

As a child, I always loved porridge. I even remember loving a story - The Magic Porridge Pot - about a magic pot that cooked endless amounts of porridge, to the extent that the whole town ended up flooded with the stuff. That sounded like my dream! Then I discovered that the traditional way to have porridge is not, as I was used to, with sugar, but actually with salt. Hm. I wasn't so convinced by this. And health-conscious people recommended eating porridge with neither salt nor sugar added. I have tried this, and while I can eat it, it just didn't excite me enough - and like I mentioned earlier, I have to really have a breakfast that I love (what else can motivate me to get out of bed in the morning, if not the food I'm about to eat?!).


So by all means, if you enjoy plain or salty porridge, please don't follow me and my bad habits. But if you are not so bothered by the idea of sugary porridge, or just want a 'treat' breakfast, then I can highly recommend porridge as a great, stodgy breakfast that will fill you up for the whole morning (seriously, I have had to reduce my portion from the recommended amount on the porridge oats pack, as I was too full - can you imagine?!). 

First things first - don't buy those handy little sachets of pre-mixed porridge oats (with/without added flavourings). Just buy a packet of porridge oats from the supermarket (I have recently discovered Morrisons do a bag for 99p for 1kg that makes a tasty porridge, but I also like Scott's Porage Oats). I use 30g of oats and 200ml of milk (if you're trying to be healthier, you can use water or half water, half milk), plus a heaped teaspoon of sugar (honey is a healthier alternative you can use). When I'm trying to be really quick (most mornings before work!), I put it in the microwave for two-and-a-half minutes, then stir, then back in the microwave for a further two minutes. 

If I have a little more time, I combine my ingredients in a pan and cook over a medium high heat on the hob, stirring constantly (make sure and stir from the outside of the pan right round and inwards until you reach the middle, to make sure it doesn't stick at all) until the porridge reaches a nice creamy consistency. This method doesn't take much longer than the microwave method, but it does involve standing by the hob for the whole time. I prefer to use those 5 minutes to get dressed, make a packed lunch or put on my make-up!

For a change, why not add a couple of handfuls of sultanas into the mix before cooking it, and then scatter some chopped almonds on top when it is ready? I have been doing this recently and it really adds the wow-factor to this breakfast favourite. An added bonus is that with the natural sweetness of the sultanas, you don't need as much sugar. Perfect! Or if you're feeling very bad, skip the sugar, but add a dollop of golden syrup at the end of the cooking process. This makes for delicious porridge, but it is certainly not the healthiest breakfast!

Milk

If you are really short on time, or just feel you can't face proper food in the morning, milk is a good option to at least line your stomach. Sometimes I'll have a glass with my eggs and toast, just to fill me up that bit more. If you're feeling naughty, like I often am, you could have flavoured milk (I love chocolate milk and use Nesquick powder to flavour mine). Although this is clearly less healthy, I tend to think it is still a better option than not having the milk at all and then reaching for a bar of chocolate half way through the morning.


Yoghurt

I don't love plain yoghurt, but there are some delicious vanilla yoghurts or yoghurts with fruit bits through them that I do enjoy. For a nice summertime breakfast, try a bowl of yoghurt (plain or otherwise) with some fresh fruit. I like mine with grapes, blueberries or even chopped up apple pieces. Or a combination of all three! This is a nice, fresh breakfast with lots of goodness from the fruits, but the yoghurt should ensure it is also nice and filling.

Over to you....

Do you have any good breakfast ideas you'd like to share? Or, if you don't like breakfast, I hope that the above ideas might inspire you to try and change this! Please let me know what you think; I love to get comments on my blog.


Sunday, 15 September 2013

Katie's Cous Cous Salad


One of my fellow bloggers, Anna at Pink Pom Poms  blogged a few months back about the difficulty of eating healthy, tasty lunches at work, and the temptations of canteens and high street offerings. Not only can you waste a LOT of money constantly buying lunch when at work, but chances are you're also not eating as healthily as you could be. I'm a big fan of packed lunches - but only if they're interesting and tasty - and not too much effort to prepare the night before. But I'm not a great fan of sandwiches - at least, not every single day. So I thought I'd blog about a nice cous cous salad I made today. In addition, I noticed that Lisa, over at Lisa's Kitchen, is running a competition for veggie salads featuring mushrooms - which my cous cous salad does - so I figured now is a good time to post this and enter the competition at the same time. For more information on this competition or great recipe ideas from Lisa, click here.

I love a good cous cous salad, and have a couple that I like, but today's was a new experiment that went well! I had it for lunch with a mixed salad (lettuce, cucumber, cherry tomatoes, red pepper, mozzarella and beetroot) and my homemade pink coleslaw (more about that later - very easy, and pretty too!). I have boxed up a bit of each 'component' of my salad for lunch tomorrow and the day after, and I still have a decent-sized portion of the cous cous salad left (perhaps to have with dinner one day, or if I make up some more mixed salad, it'll do me for another day's packed lunch). So you can see, this is a great way of taking the hard work out of preparing a packed lunch. I should really have timed myself better, but I would say that altogether this took me under half an hour to prepare.


It was absolutely delicious - the sultanas gave a nice juicy burst of flavour and the toasted almonds gave  a nice crunch. And I just love the taste of roasted mushrooms in any dish. It was also good in that it filled me up nicely but not so much that I felt stuffed, so you won't require a siesta after this one! I would also happily have this as an accompaniment to a larger dinner, so it really is versatile. All in all, a winner!


Ingredients:
1 medium leek
1 medium courgette
80g baby button mushrooms
1/2 yellow pepper
3 tsp olive oil
1 tsp lemon juice
black pepper, to taste
200g cous cous
70g sultanas
250ml vegetable stock
30g almond slivers

Method:
Pre-heat the oven to 200ºC. Finely chop the leek, courgette, mushrooms (I quarter these) and pepper; place these in a roasting tin. Mix the olive oil and lemon juice, and add a little black pepper - sprinkle over the vegetables. Mix well and put in the pre-heated oven for 15 minutes. Meanwhile, put the cous cous and sultanas in a heat-proof bowl and pour the stock over. Leave for the cous cous to absorb all of the stock. Now, gently toast the almonds by dry frying them (i.e. don't use any oil in the pan). Once the vegetables are cooked and the cous cous has absorbed all of the stock, mix the vegetables and almonds into the cous cous mixture. The cous cous salad is now ready to serve, or if preferred, you can leave to chill before serving - both will be delicious.

Two lunch boxes full of delicious salad
 And as for that pink coleslaw? Yes, that's the little bit of pink you can see in the pictures above (but I've put a better picture below, too). Well, it's really simple - I just grated half a carrot and half a cooked beetroot into a bowl and added a couple of tablespoons of light mayonnaise. Mix together, and you have pink coleslaw! Because there's no cabbage in this coleslaw, it isn't tangy like real coleslaw - in fact, it has a lovely smooth taste - but the carrot still gives it a bit of bite.


 Let me know what your verdict is, if you make my cous cous salad or pink coleslaw. I'd also love to hear any other great packed lunch ideas, if you have some?

Saturday, 14 September 2013

Morrisons Magazine Recipe - Veggie Version (Lemon and Thyme Quorn Fillets)


Now I am not the type of vegetarian who misses meat. I gave up eating meat over twenty years ago now, at the tender age of ten, so I can hardly remember what some meat tastes like, and have never even tasted some types of meat (to the best of my knowledge, I have never in my life eaten lamb, steak, veal, duck....the list goes on). But I am the type of vegetarian who sometimes buys 'fake' meat, for example, Quorn products.

Why? Well, in some cases, it can just be convenient to have an easy vegetarian alternative for me to use if I like a recipe but it contains meat. Or for example, I will often put Quorn or Linda McCartney veggie sausages and burgers on a barbecue, as part of the barbecuing experience seems really to be to have a burger in a bun. I will happily eat veggie skewers from a barbecue, or barbecued halloumi (yum!) too, but sometimes it is just so simple and tasty to have something ready to fling on the barbeque in the same way the meat eaters do. And I often throw some Quorn Chicken-Style Pieces into a stir-fry. Sometimes I don't, but other times, I like the taste of the Quorn and so in it goes - it's just nice to have another possible ingredient to include in my stir fries.

I also love watching cookery shows, but as so much of what is made on-screen can be meaty, 'fake' meat products can be an easy way of making the recipes they demonstrate vegetarian. Not always, of course, but sometime. The trick is figuring out which ones will work, and which ones won't. When I saw the front cover of the current Morrison's Magazine (September/October 2013 edition, free in-store), I knew immediately that I wanted to try that recipe! Shame I didn't notice the chicken in it.....oh dear. But then I thought, well, why not try it with Quorn Chicken-Style Fillets? So that is exactly what I did, a couple of nights ago, tweeting to anyone who would listen (including Quorn UK and Morrisons Magazine) about my exciting experiment.

So this is my report on how I got on.

The original recipe is Lemon and Thyme Chicken, which can be found on page 5 of the magazine. As well as using Quorn instead of chicken, I slightly altered some other details, just based on what I did/didn't have in the kitchen that day. I substituted onion for shallots, just because I had them on hand and didn't have shallots - the two do have slightly different tastes, but really you can easily substitute one for the other. I also didn't have any fresh thyme. At first, I thought I really should go out and get some, as it is a major component of the dish, but then I decided just to use dried, as it saved me a trip to the shops, and I figured that this was an experiment to see how well the Quorn worked, rather than anything else.

I'll also take this opportunity to mention that while I did use white wine, as per the recipe, I have discovered over the past couple of years that 'old' wine that has been open for a few weeks is absolutely fine to use in cooking. Of course I would never drink this old wine, but I use it all the time in my risottos - it just means that I don't have to worry about drinking the rest of the bottle when I open one to cook with! So in this recipe too, I used my old cooking wine.

I halved the recipe, as the original version is for 4, and I didn't want to cook that much (especially if it didn't turn out well!). But you could definitely scale it back up to a meal for 4 if you wanted to. So I used four Quorn fillets. As these were frozen, I defrosted them on 50% power in the microwave for a couple of minutes before starting my cooking. I followed the instructions to fry the fillets, but naively thought that since Quorn was not meat, it would need less time to brown, so could just go in with the onions. I have no idea why I thought this, as although this was my first time pan frying Quorn fillets, I do regularly stir fry Quorn Chicken-Style Pieces, and know how long they take to brown. Call it a blonde moment. So, if I were doing this again, I would do it as described in the instructions below, and wouldn't make the mistake of trying to cook the onions and brown the fillets together.

Quorn looking a bit pale, but otherwise, good!


Ingredients:
1.5 tbsp olive oil
4 Quorn Chicken-Style Fillets
1 and a half medium onions, sliced
4 garlic cloves, unpeeled
1 tsp dried thyme
1 small lemon, half sliced, half juiced
125ml white wine

Method:
Heat the oven to 200ºC (180ºC fan). Heat a little oil (start with half a tablespoon and add more as needed) in a pan on medium-high heat. Season the Quorn and onion, then fry the Quorn until browned. Once browned, add the onion and cook until the onion is soft and translucent. Add the garlic, thyme, lemon (both slices and juice), and white wine. Bring to the boil and then simmer for five minutes.

Transfer to a casserole dish and put in the oven. Cook for 35 minutes. (The Quorn will be cooked though already, so you can put it in the oven for less time if you like, I just felt it would help the flavours develop further.)


I felt that this recipe was a great success. I was initially hesitant about using Quorn fillets, as I find they don't always take on flavours in cooking as well as I am led to believe chicken does. However, probably due to the longer cooking time, I felt that the fillets really took on the delicious lemon and wine flavours in this dish. The thyme worked great, though I am sure that it would have looked more impressive if I had used fresh herbs. But I am a big believer in using what you have in the store cupboard where possible, and so really, unless I was cooking this for guests, I think I would always opt for dried thyme over fresh.

I would suggest serving this with some nice broccoli and carrots to make a tasty, healthy meal.

Tuesday, 10 September 2013

Brilliant Banana Bread

a.k.a. "When Kitchen Experimentation Goes Right"


Today, I decided to try and bake a banana loaf for the first time ever. I have tried a few different people's banana bread recently - with chocolate chips and without - and every single bite I have taken of every single different type of banana loaf, I have thought to myself 'I must try to make this one day'. So today was that day.

Having heard that banana bread is quite a forgiving type of cake, in that you can't really mess it up by putting in too much or too little of a certain ingredient, I decided to do without a recipe (I didn't see any that I liked 100%) and just have a go myself. And the results were completely delicious! So sweet, and moist, and banana-y, with a crisp sugar topping - everything I wanted my banana bread to be (and everything David wanted it to be too!).


I had always thought that the bananas used for a banana loaf had to be old, with blackened skin, but as you can see from this picture, I only had one old banana - the others were pretty normal bananas that I would usually eat as they are. And the loaf tasted great. So I think that really, while you can use older bananas for this recipe, it's not actually necessary. 


Also, I used a bar of chocolate and chopped it into chunks rather than buying a packet of chocolate chips - it's cheaper and also lets you dictate the size of the chunks (I think randomly-sized chocolate chips are the true sign of a home-baked cake!).


So I'm going to share my recipe with you. The only thing I would maybe do differently next time is add some bicarbonate of soda to make it rise more. I used self-raising flour (one of the things I didn't like about some of the recipes I saw was the amount of different raising agents in them - surely it shouldn't be that difficult?) and it was fine, but if you wanted your loaf to rise a bit more, then it seems that added raising agents might just be necessary.

This is how I did it:

Ingredients:
125g caster sugar (actually I used granulated, but I know you're supposed to use caster sugar in baking, so....)
125g butter, melted (plus extra to grease tin)
1 tsp vanilla extract
1 medium egg, beaten
3 medium bananas, roughly mashed
100g milk chocolate (chopped roughly into chunks)
190g self-raising flour
1 tbsp light brown soft sugar

Method:
Pre-heat oven to 170ºC. Grease and line a 10x20cm loaf tin.
Mix the caster sugar, melted butter and vanilla extract together. Add the beaten egg , banana and chocolate chunks and mix well. Sieve in the flour, mixing well as you go.
Pour the mixture into the loaf tin and sprinkle the brown sugar evenly over the top. Bake in the pre-heated oven for one hour, or until a skewer comes out almost clean. Leave to cool, then cool further on a wire rack.


This recipe has gone down so well, we can hardly stop ourselves from going back for "just one more slice". I want to make this loaf every day now, it's that good (and easy!), but something tells me we'd both end up the size of houses if we were to have daily access to banana bread that good! If you're looking for a winner to take into a bake sale at work, or simply to impress your friends when they pop in for a coffee, this one will fit the bill, no doubt about it.


Sunday, 8 September 2013

From my Veggie Kitchen to the New York Kitchen


Today, being on holiday and being a big fan of going out for breakfast or brunch, I decided to go for a very late breakfast with my boyfriend, David. A trip away from my beloved veggie kitchen! Perhaps my love of going out for meals early on in the day stems from the years I lived in Berlin, where weekend brunch was always very popular - almost all cafes seemed to offer an all-you-can-eat brunch deal, and often they were also very cheap (some even included a cheeky glass of prosecco). Those Berlin brunches offered something for everyone, with muesli, fruit, bread and cheese/meat, waffles (often of the DIY variety, which added an extra sense of fun), cooked breakfast fare, pasta dishes, and stew-type offerings. And cake, of course. I fell in love with the idea of going for brunch. But then I returned to the UK, and realised that here, brunch is something very different.

We seem to have adopted the idea of brunch from America, as a lot of brunch offerings seem to include pancakes and maple syrup - or perhaps it is just another form of 'all day breakfast', with the full Scottish/English fry up being on offer. But that's ok too. A lot of places offer a full vegetarian breakfast, and I happen to love those (when they are done right. No points to a certain hotel where I was once served a plate of baked beans with two mushrooms on the side as their idea of a full veggie breakfast). So I was very excited about our little breakfast experience today.

We decided to try out a fairly local and fairly new cafe, called the New York Kitchen (at the Thornwood end of Dumbarton Road, Glasgow). First impressions were fairly good - I like the style of the place, all cute red tablecloths and wooden tables, and lovely big patio doors at the front letting in plenty of natural light. A print of the New York cityscape hanging on the wall. The soundtrack of 1940s American crooners on the stereo (at an appropriate volume) completed the mood.

The first thing we heard was the waitress announcing to another table that there were no bagels, to the obvious disappointment of the diners. Not a great start, but onwards and upwards, I thought. We were then informed (after having ordered our drinks) that there were also no waffles. Of course, that was exactly what we were both going to order. So, time to re-consult the menu. Fine. The waitress then reappeared to inform us that there was also no salmon. I was beginning to wonder what the cafe actually did have to serve us.

My chocolate milkshake was delicious, no doubt about it. But David's orange juice came straight from a carton - disappointing, to say the least. Surely freshly-squeezed orange juice is a big part of the whole breakfasting-out experience? Food-wise, I had opted for the full American breakfast, without the meat. The waitress did offer to give me extra hash browns and pancakes, which scored her some points with me. (I hate it when you order something without the meat part of the dish, and then get charged full price - I appreciate that you're asking for customisation, but really, the higher price is surely justified by the expensive meat on your plate. So by offering some substitutes for the meat, things seem fairer.)

However, I have to say, I wish I hadn't had all the extras, as the overall standard was poor. The fried eggs were decent, and the hash browns were also fine (though I suspect probably they came straight from the frozen section of the supermarket), but the pancakes and French toast were really not good. Completely dry and tasteless, I got the impression that they had been sitting under the heat lights for some time, waiting on some unsuspecting diner to order them. Having drowned both in maple syrup, I was happy to almost clear my plate (I was hungry!), but we were both disappointed, and definitely won't be making any return trips.

This is a perfect example of a cafe with potential - it is in a good location (that part of the street has been attracting a few more eating establishments over the past few years), and the vibe of the place is spot on. But the food (which should surely be the star of the show) really lets it down. Up your game, New York Kitchen, as I really wanted to like you, but just can't recommend a cafe with food as substandard as yours!

Friday, 6 September 2013

Roasted Vegetables and Halloumi with Cous Cous - Best Meal Ever?


Today, I learned the importance of getting the little things right. I had all the ingredients I needed, all the kitchen equipment on-hand, and the recipe was a tried and tested one I've been making for years. It should have been so easy. But then disaster struck - our trusty tin opener failed! Now I should have seen this coming. This tin opener came with the flat and so I don't know where it was bought or how much it cost. But if anyone actually paid anything for it, I would now say they were ripped off.

We don't ask much of the humble tin opener, do we? Its sole purpose in life is to - you guessed it - open tins. Nowadays, so many tins come with ring pulls, that actually, we ask even less of the tin opener - it only has to open the occasional tin. The rest of the time, it can lay back and relax in the cutlery drawer. But when we take it out, we expect it to work! That is all we ask! But no, today that was just too much for our tin opener, it seems. I spent a good (well, bad, actually) ten minutes wrestling with the thing, hacking away at my can of baby carrots, wondering just how much I needed them. I took a sharp knife to the tin. I tried prising the half of the lid that was open away from the tin using a fish slice. I swore at the tin opener for being so stupid. Finally, with a bit of hacking, stabbing and prising (the swearing didn't help, but it did make me feel better), I managed - just - to coax the contents out of the tin. Wow. And this was supposed to be an easy dinner!

You will be glad to know that all that effort will definitely be worth it, as I was making one of my favourite meals to take to my friend's birthday buffet tonight. It has halloumi cheese in it, which has to be my very favourite ingredient. And cous cous - which I am also a huge fan of, partly for its sheer simplicity. The recipe is loosely based on one my mum found in a cookbook years ago for vegetable kebabs. Sadly, I can't remember the name of the book, or I would give it the credit it is due, but basically we loved the idea but didn't really love the whole kebab element, so did away with the skewers, mixed up the vegetables to include any we liked, and voila! Roasted Vegetables with Halloumi and Cous Cous was born.


The best thing about this recipe is you can play about with it as much as you like and it's still great. I probably never make it the same way twice, actually. The picture above gives some ideas of what you could put in the dish, but really, as long as the halloumi is there, you can't go wrong. Today I put the following in along with the halloumi: baby carrots (yes, those of the tin that would not open), baby button mushrooms, courgette chunks, white onion chunks, and red onion slices. You could also add aubergine, sweetcorn, parsnip (best to parboil it first though), baby corn cobs, chunks of salad pepper....in fact, probably just about any vegetable. Some would have to be parboiled first in order for them to cook through properly, but other than that, just throw them in and experiment! The main thing, I think, is the colour - try to get this dish as colourful as you can, and it will taste great (that's also a good way of ensuring you're getting a wide variety of nutrients, apparently). I eat this with plain cous cous. But you could change that too. My mum loves it with harissa paste through the cous cous, or you could make your cous cous with vegetable stock instead of water for a bit more flavour.


But just to get you started, I'll give you the basic recipe. I would say this should serve two (but see my disclaimer, below!)

Ingredients:
1 yellow onion
1 red onion
1 courgette
1/2 tin of baby carrots
150 g baby button mushrooms
250 g halloumi cheese
3 tbsp olive oil
1 tbsp lemon juice
1 or 2 cloves of garlic
a pinch of salt and pepper
200 g cous cous
200 ml boiling water

Method:
Chop all the vegetables and cheese into bite-sized chunks. With the onions, I like to cut one into chunks and slice the other, just for the visual appeal. Place into a baking dish in a single layer. If necessary, spread over two baking dishes in order not to over-crowd the dish. (If you roast the vegetables piled on top of each other, they'll steam rather than roast, and that's not what we're going for here!)

Now mix the olive oil and lemon juice well in a jug. Crush the garlic and add it along with the salt and pepper to the oil and lemon juice mixture. Mix again.

Drizzle the oil mixture over the vegetables. You don't want to drown them, so if you feel that you have more oil than you need, stop pouring once you feel you've drizzled enough. Take a spoon and mix the vegetables around a bit, ensuring that they all get a slight coating of the oil mixture.

Put in the oven for 30 minutes, or until the halloumi looks golden brown and the vegetables are cooked to your liking.

To prepare the cous cous, put it in a heat-proof bowl, cover with the boiling water, and leave it to absorb the water. When it has done so (after about five minutes), take a fork through the cous cous to separate the grains.

Serve the roasted vegetables and halloumi on a bed of warm cous cous.


This is possibly my favourite meal ever. There is just something so moreish about it! The slight hint of garlic really makes it stand out, flavour-wise, and I just love how the halloumi goes crunchy on the outside, and soft and 'squeaky' on the inside (did I mention it's one of my favourite ingredients?!). I find it hard to say  how many the above quantities should serve, as I am a greedy guts with this meal, and could eat the whole lot myself. I have guessed and said it should serve two though, and hopefully that is somewhere close to the truth.

As I write, in fact, I am struggling not to eat the whole thing to myself - not only is this supposed to be taken to my friend's, as I said earlier, so I shouldn't be eating any of it, but also I'm on antibiotics at the moment, and I have to take them on an empty stomach (and not eat immediately after taking them). I have to take them 4 times a day, so I'm having to constantly force myself not to snack, not to sneak a wee taste of what I'm cooking, etc. It's hard! So I am going to have to be really disciplined with this particular batch of Roasted Vegetables and Halloumi, if it is to make it to my friend's party, and if I'm to have any chance of taking the next dose of my medicine correctly.

I will let you know how it goes down with the other guests. In the meantime, do you have any favourite dishes that have stood the test of time that you'd like to share? (And any tips for reliable tin openers are now also gratefully received. Think I'll be heading to Ikea sometime soon - there are some things you just know Ikea will get right where others have got it so wrong, don't you find?)

Monday, 2 September 2013

Back to Basics 1: Eggs


I love eggs. Apparently, this was not always the case (just ask my mum for the story of my first taste of egg - I don't want to spoil your appetites, so won't repeat it here). I spent a while a few months back perfecting my egg poaching technique (or at least, trying to) and I love reverting back to childhood memories and having soft-boiled eggs and 'soldiers' made of toast to dunk into the gooey yolk. Delicious! And what would a vegetarian English (or Scottish) breakfast be without a nice fried egg (if someone gives you a choice, it has to be fried - this is a fry-up, after all!).

My only rule with eggs is that they must be free-range. Why? Well, I may not be vegan, but part of the reason I am vegetarian is I am concerned about animal welfare. Buying free-range eggs is a very easy way for anyone to support kinder farming methods. Even though I love a bargain and will always look for ways to save money at the supermarket, I would never ever consider downgrading to battery or barn eggs - I just couldn't bear the thought of those hens cooped up in cages, or in dark barns, just to provide cheaper eggs for me. Of course, people also argue that free-range eggs taste better, but since I have been eating free-range for as long as I can remember (my mum is of the same school of thought as I am on this one), I couldn't honestly say I know if there is a difference in taste.

Ready to be made into egg mayo
It can be difficult to know if everything I eat that contains eggs contains free-range eggs specifically - so my rule is this: if I have a choice, and am aware of a free-range option, I will always take that option. If I am buying cakes at a charity bake sale, for example, or the pasta I am buying does not specify what type of eggs are used in its production, then I don't have access to the necessary information, and I just have to hope that I am eating free-range. That may not be enough for some people, but for me, it works.


Egg mayo!
Anyway, away from the ethical debate, and back to the topic at hand: actually cooking eggs! Now, I know this may seem pretty simple, but I have had a couple of readers tell me that they love reading my blog, but have a fear of the kitchen. For those readers (and anyone else who feels like that), I want to take things back to basics. Now, I haven't thought far enough ahead to have worked out what else I can take this approach with (even as a student, I could never write an essay plan to the end, so what made me think I'd be any better at forward-planning for my blog?!), but for now, I would like to say that this is supposed to be the first of several (or at least, a few!) posts that will take you back to the basics of cooking vegetarian food. Today is all about the humble egg (in case you hadn't already guessed).

How to Keep Eggs

Firstly, storage. I know that most people keep eggs in their fridge. In that special little egg-holder thing that sits in the door - that's where they go, right? Well, no, not necessarily. Eggs cook best from room temperature, so why would you want to chill them, only to have to bring them back to room temperature to actually use them? Think about it: where are the eggs stored at the supermarket? Not in the refrigerated section, are they? No, they are stored on the shelves, at room temperature. So I store them in the cupboard at home - that way, they are always at room temperature, ready to be used, and also, some much-needed extra room is freed up in the fridge. Win-win!

Secondly, forget the use-by date. There is no need for use-by dates on eggs. I know some people are really funny about adhering to these stamped-on dates, and worry about salmonella if they use their eggs after this date has passed, but really, there's no need. There is a simple test you can do to determine whether or not an egg is still good. Fill a jug with water, carefully place the egg into this, and see whether the egg sinks or floats. If it sinks, it's good to cook. If it floats, that means it's too full of air and has gone bad. Bin it. (A really fresh egg will completely sink, lying on its side on the bottom of the jug. Eggs that sink to the bottom but then 'balance' on one end, appearing to stand up [but still touching the bottom of the jug], are still fine to cook with, but just not quite as fresh as the ones that completely sink. I regularly cook with these 'balancing' eggs, and they are always delicious.) Reading back over that, it does sound suspiciously like the old 'witch test' you learned about in school history lessons, but I can assure you, this test actually works (and no innocent women are killed as a result)!

The 'sink or float' test

Peeling Boiled Eggs

Speaking of eggs that aren't quite as fresh, if you are hard-boiling your eggs and wanting to peel them afterwards, you probably want to cook with an egg that is not perfectly fresh, as it makes the peeling much easier. Ah, the peeling! So if you have got as far as this stage, it probably means that you have boiled your egg successfully. I will come back to how to do that in a minute, don't worry! But as far as peeling goes, this is how I do it. Once you have cooled your egg in a bowl of cold water (with ice cubes if you want to speed up the process a bit), simply tap each end of the egg on a hard surface to crack, then, putting the egg back into the bowl of water, roll the egg on its side, right the way round, so that eventually it has cracks all the way round its shell. The picture on the left, below shows how it should look. Now, starting at the top, where it should be easiest to find a piece to peel away, simply peel the whole shell off. The older the egg, the more easily it will come away (take a look at the other two pictures below - these were older eggs, and look at how the shell is peeling away so well), but even with fresher eggs, I find this to be the easiest method of all that I've tried.


How to Boil an Egg

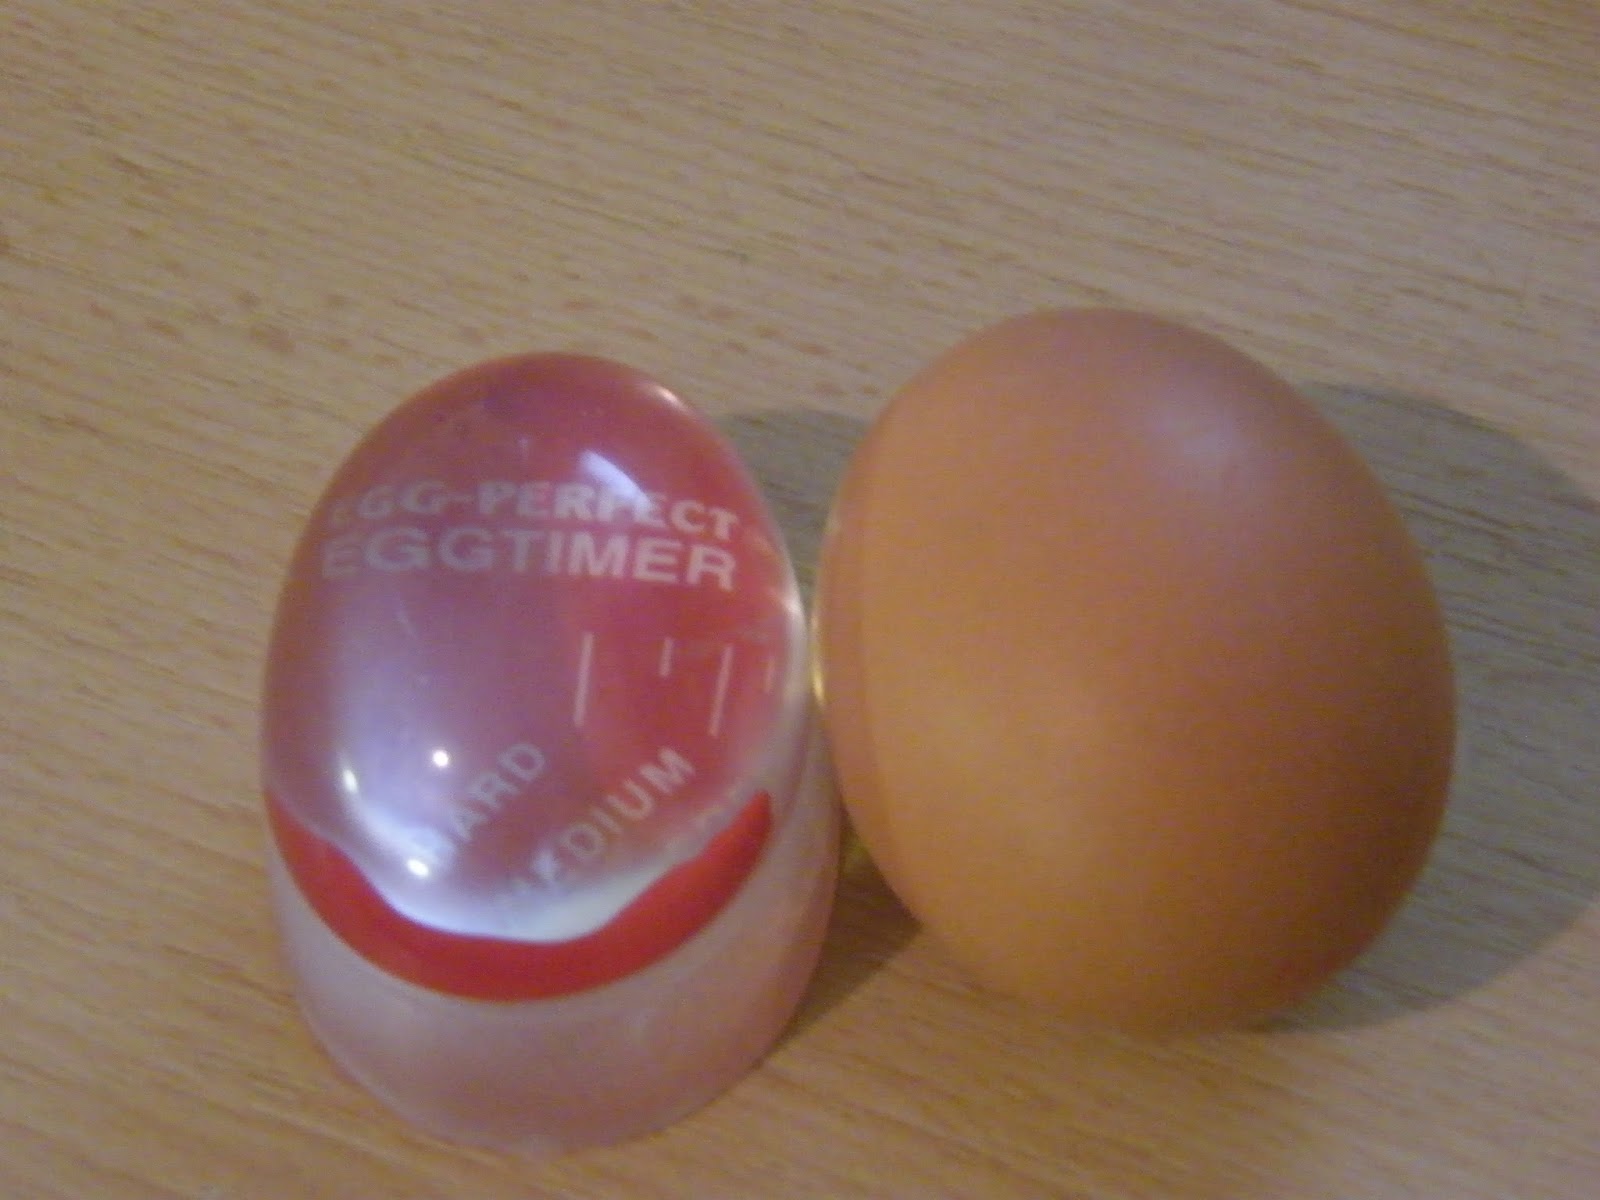
Now, how to boil that egg. For the complete beginner, I cannot recommend highly enough the little in-the-water egg timers you can buy very cheaply (I've seen them online, in pound shops, and in more expensive kitchenware stores). Now I know that there are some concerns about how safe these are, with fears that chemicals from the plastic may leak into the water and find their way into the eggs. But I have to say, I wouldn't have thought they could pass all the safety tests and be on the shop shelves if there were really any danger. So I choose to ignore all of that, and focus instead on how easy they make the process of boiling an egg! Simply place your egg(s) (the timer works equally well for a single egg as it does for multiple eggs) in a small pan of cold water with the timer (the water should cover the eggs well), bring to the boil, and keep an eye on the timer. This timer does not ring when the time is up! In fact, 'timer' is probably the wrong name for it altogether, as it does not time the eggs, rather measures the water temperature. All you need to do is decide whether you want your egg soft, hard or medium-done, and take the egg(s) out of the water when the colour changes up to the line that corresponds to how you want your egg done. Simple! 


Clever egg 'timer' 
In the pan, ready to go


If you don't have one of these 'timers', I would suggest buying one right now! But if for whatever reason you can't, or have problems with the possibility of chemical release in the water, I would point you in the direction of Delia Smith, who explains very well two methods of boiling eggs successfully without this type of timer.

Now, if you have hard-boiled and peeled your eggs, why not half them and add them to a nice salad (a good way to add some protein), or chop them roughly and smother with mayonnaise (free-range, of course!) and some freshly-ground black pepper for a delicious egg mayonnaise sandwich filler. I plumped for the egg mayo option for my lunch - perfect! When you see how easy it is to make your own, why would you ever buy egg mayonnaise from a shop again?

Let me know if you have tried the egg 'timer' I mention above - are you as big a fan as I am?


Egg mayo and lettuce wrap